
Changing your name on Facebook is a straightforward process, whether you're updating it due to a legal name change, wanting to use a nickname, or simply personal preference. Here’s a step-by-step guide on how to do it:
Before You Start
1. Review Facebook’s Name Standards: Facebook requires users to use the name they go by in everyday life. Avoid using any unusual capitalization, punctuation, characters, or titles.
2. Frequency of Changes: You can only change your name every 60 days. Plan accordingly.
3. Language-Specific Names: You can add an alternate name in another language if you are bilingual.
Step-by-Step Guide to Changing Your Name on Facebook
On Desktop
1. Log In to Facebook: Open your web browser and go to [Facebook](https://www.facebook.com/). Enter your username and password to log in.
2. Access Settings: Click the downward-facing arrow in the top right corner of the Facebook homepage. From the dropdown menu, select “Settings & privacy” and then click on “Settings.”
3. Edit Name: In the "General Account Settings" section, you will see your name. Click the "Edit" button next to your name.
4. Enter New Name: A new window will open where you can enter your new first name, middle name (optional), and last name.
5. Review Your Name Change: Ensure your new name adheres to Facebook’s standards. After entering your new name, click “Review Change.”
6. Choose Display Format: Facebook will ask you how you want your name to appear on your profile. Select the appropriate format.
7. Enter Password and Save: Enter your Facebook password to confirm the change, then click “Save Changes.”

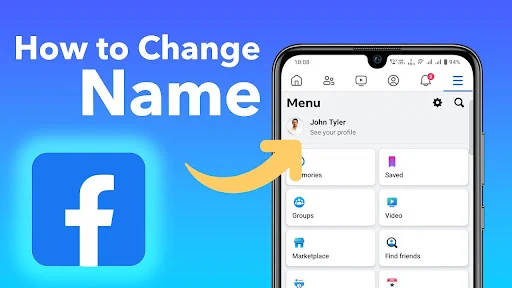
On Mobile App
1. Open the Facebook App: Tap the Facebook app icon on your smartphone.
2. Go to Menu: Tap the three horizontal lines (menu icon) in the bottom right corner on iOS or the top right corner on Android.
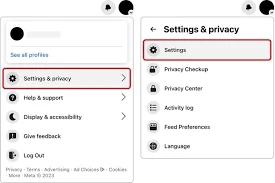
3. Access Settings & Privacy: Scroll down and tap “Settings & privacy,” then tap “Settings.”
4. Personal Information: Under the “Account” section, tap “Personal and account information.”
5. Edit Name: Tap “Name,” and then enter your new first name, middle name (optional), and last name.
6. Review Change: Tap “Review Change” and choose how you want your name to appear.
7. Enter Password and Save: Enter your password to confirm, then tap “Save Changes.”
Additional Tips
- Profile Verification: If you have a verified profile, changing your name might require additional steps.
- Other Names: If you want to display a nickname, maiden name, or other variations, you can add this by going to “About” on your profile and selecting “Details About You.”
- Notification to Friends: When you change your name, Facebook does not send a notification to your friends, but it will be visible on your profile.
Troubleshooting
- Name Change Rejected: If Facebook rejects your name change, it may not meet their standards. Double-check the guidelines and try again.
- Too Many Changes: If you’ve changed your name too frequently, you may be temporarily blocked from doing so again. In this case, you’ll need to wait for the cooldown period to pass.
By following these steps, you can successfully change your name on Facebook, ensuring it reflects how you wish to be identified. Always make sure to follow Facebook’s guidelines to avoid any issues with your account.


No comments:
Post a Comment
Thank you for your support