Showing posts with label recipe. Show all posts

Friday, June 7, 2024

The Versatility and Global Appeal of Cooked Rice

 The Versatility and Global Appeal of Cooked Rice

Rice, one of the most essential staple foods worldwide, boasts a rich history and a myriad of culinary applications. From the aromatic basmati rice of South Asia to the sticky sushi rice of Japan, cooked rice plays a central role in diverse cuisines, providing both nutrition and comfort.

 Historical Significance

Rice cultivation dates back thousands of years, originating in the regions of China and India before spreading across Asia and eventually to Europe, Africa, and the Americas. Its adaptability to different climates and soil conditions contributed to its global spread. Today, rice is cultivated in over 100 countries, making it a vital food source for more than half of the world’s population.

Nutritional Value

Cooked rice is a powerhouse of energy, primarily due to its high carbohydrate content. A single cup of cooked white rice provides about 200 calories, 45 grams of carbohydrates, and 4 grams of protein. While white rice is the most common variety, brown rice offers additional nutritional benefits, including higher fiber, vitamins, and minerals. Brown rice's whole grain form preserves the bran and germ, providing antioxidants, magnesium, and more fiber, which are often removed in white rice.

Culinary Uses Around the World

1. Asia:
   - Japan:Sushi, a globally beloved dish, features vinegared rice paired with raw fish or vegetables. Another popular Japanese dish is donburi, where cooked rice is topped with various ingredients like tempura, beef, or eel.
   - China: Fried rice is a staple, utilizing leftover rice stir-fried with vegetables, eggs, and meat. Congee, a rice porridge, is a comforting breakfast option.
   - India:Biryani and pulao are fragrant rice dishes cooked with spices, meat, or vegetables. In South India, rice is often fermented to make dosas and idlis.

2. Middle East and Mediterranean:
   - Iran: Saffron-infused Persian rice (chelow) accompanies kebabs and stews, often with a crispy bottom layer called tahdig.
   - Greece: Dolmades, grape leaves stuffed with rice and herbs, are a popular appetizer.
3. Latin America:
   - Mexico: Rice is a key component of dishes like arroz con pollo (rice with chicken) and Mexican rice, which is cooked with tomatoes, garlic, and onions.
   - Caribbean:In the Caribbean, rice and beans are a common pairing, providing a complete protein when eaten together.

4. Africa:
   - West Africa: Jollof rice, a one-pot dish cooked with tomatoes, onions, and various spices, is a festive favorite.
   - East Africa:Pilau, a spiced rice dish, is enjoyed with meats and vegetables.

5. United States:
   - Southern Cuisine:In the southern states, dishes like jambalaya and gumbo feature rice as a central component.
   - Hawaii: Spam musubi, a popular snack, consists of cooked rice topped with grilled Spam and wrapped in seaweed.
Cooking Methods

The method of cooking rice varies depending on the desired dish and regional preferences. Common techniques include:
- Boiling:Often used for plain rice or as a base for other dishes.
- Steaming:Ensures even cooking and is typical for dishes requiring a fluffy texture.
- Absorption: Involves cooking rice with a precise amount of water until fully absorbed, commonly used for dishes like pilaf and biryani.
- Frying: Leftover rice is often stir-fried with ingredients, creating a quick and flavorful meal.

 Conclusion

Cooked rice's global ubiquity and versatility make it an indispensable component of many diets. Its ability to absorb flavors, complement a wide range of ingredients, and adapt to various cooking techniques has cemented its place in culinary traditions around the world. Whether enjoyed as a simple bowl of steamed rice or an intricate biryani, cooked rice continues to be a beloved food, bridging cultural gaps and bringing people together through its universal appeal.

The Art of the Crepe: A Culinary Delight

 The Art of the Crepe: A Culinary Delight

Crepes, delicate and versatile, have long been a cherished dish in French cuisine. Originating from the Brittany region in France, crepes have evolved into a global culinary phenomenon. They can be enjoyed in a myriad of ways, ranging from sweet to savory, making them a favorite for any meal of the day. This article delves into the history, preparation, and popular variations of this beloved dish.

 A Brief History

The history of crepes dates back to the 13th century in Brittany, a region in the northwest of France. These thin pancakes were initially made with buckwheat flour, a crop introduced to Brittany around the time of the Crusades. Buckwheat, which is naturally gluten-free, was an ideal choice given its resilience in the region's poor soil conditions.

As time progressed and wheat flour became more widely available, the sweet crepe, or "crêpe de froment," made from wheat flour, became popular. The crepe's adaptability and simplicity helped it gain popularity, spreading throughout France and eventually around the world.

The Art of Making Crepes

Creating the perfect crepe involves a few basic ingredients and a bit of technique. The primary components include flour, eggs, milk, butter, and a pinch of salt. Here’s a simple step-by-step guide to making classic French crepes:

1. Batter Preparation: In a mixing bowl, whisk together the flour and salt. Create a well in the center and add the eggs. Gradually incorporate the milk while whisking to prevent lumps. Finally, add the melted butter and mix until the batter is smooth. Let the batter rest for at least 30 minutes to allow the flour to fully absorb the liquid.

2. Cooking: Heat a non-stick skillet or crepe pan over medium-high heat. Lightly grease the pan with butter or oil. Pour a small amount of batter into the center of the pan and swirl it to evenly coat the surface. Cook for about 1-2 minutes until the edges start to lift and the bottom is lightly browned. Flip and cook for another 1-2 minutes on the other side.
3. Serving: Once cooked, crepes can be served immediately or stacked on a plate and kept warm in a low oven.

 Variations and Fillings

The beauty of crepes lies in their versatility. They can be tailored to suit any palate or occasion, whether you crave something sweet or savory.

- Sweet Crepes: Popular sweet fillings include Nutella, fresh fruits, whipped cream, chocolate sauce, and powdered sugar. One classic variation is the "Crêpes Suzette," which is flambéed with orange juice, zest, and Grand Marnier or another orange-flavored liqueur.

- Savory Crepes: Known as "galettes" when made with buckwheat flour, savory crepes are typically filled with ingredients like ham, cheese, eggs, and vegetables. The "Galette Complète" is a traditional favorite, featuring ham, grated cheese, and a sunny-side-up egg.

- Global Influences: Crepes have also been embraced in various forms around the world. In Japan, street vendors sell crepes filled with unique ingredients like matcha, sweet bean paste, and even savory fillings such as teriyaki chicken. In Mexico, a similar dish called "crepas" is often served with cajeta, a sweet caramel sauce made from goat's milk.

 Cultural Significance

Crepes play a significant role in French culture, especially on Candlemas, known as "La Chandeleur," celebrated on February 2nd. This day, also referred to as "Jour des Crêpes" (Day of the Crepes), sees families and friends come together to make and enjoy crepes. A popular tradition is to flip a crepe in the pan with one hand while holding a coin in the other for good luck.
 Conclusion

Crepes, with their delicate texture and endless filling possibilities, are a testament to the creativity and adaptability of French cuisine. Whether enjoyed as a simple breakfast, a decadent dessert, or a savory meal, crepes continue to delight and inspire food lovers around the globe. Their enduring popularity is a tribute to the timeless appeal of this versatile dish.

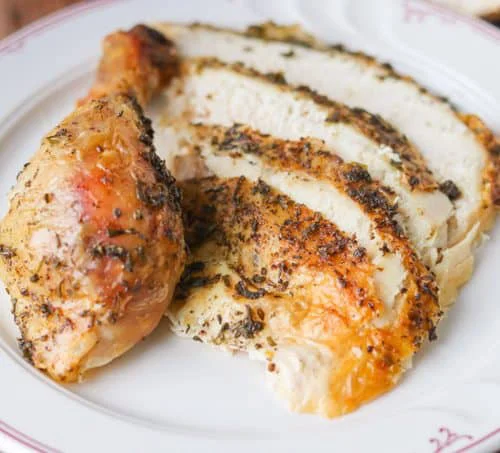
The Ultimate Guide to a Perfect Chicken Recipe: Roasted Lemon Herb Chicken

 The Ultimate Guide to a Perfect Chicken Recipe: Roasted Lemon Herb Chicken

If you're looking to create a mouthwatering chicken dish that impresses both in flavor and presentation, look no further than the roasted lemon herb chicken. This classic recipe combines the aromatic power of fresh herbs with the zesty brightness of lemon, resulting in a succulent and flavorful dish that is perfect for any occasion.

Ingredients:

- 1 whole chicken (about 4-5 pounds)
- 2 lemons, quartered
- 1 head of garlic, halved
- Fresh herbs (such as rosemary, thyme, and parsley)
- 1/4 cup olive oil
- Salt and freshly ground black pepper
- 1 onion, quartered
- 2 carrots, cut into chunks
- 2 celery stalks, cut into chunks
- 1 cup chicken broth or white wine (optional)

 Instructions:

1. Preheat the Oven:
   Preheat your oven to 425°F (220°C). This high heat is essential for achieving a crispy skin while keeping the meat tender and juicy.

2. Prepare the Chicken:
   Remove the giblets from the chicken cavity and pat the chicken dry with paper towels. This step is crucial as a dry chicken skin will crisp up nicely in the oven.

3. Seasoning:
   Generously season the inside of the chicken cavity with salt and pepper. Stuff the cavity with the halved garlic head, quartered lemons, and a handful of fresh herbs.

4. Truss the Chicken:
   Using kitchen twine, tie the legs of the chicken together to help it cook evenly and maintain its shape. This also helps keep the stuffing in place.
5. Herb Mixture:
   In a small bowl, combine the olive oil, a pinch of salt, a dash of black pepper, and finely chopped fresh herbs. Brush this mixture over the entire surface of the chicken.

6. Prepare the Vegetables:
   In a roasting pan, spread out the onion, carrots, and celery. These will serve as a flavorful bed for the chicken and also help keep it elevated during roasting.

7. Roasting:
   Place the chicken on top of the vegetables in the roasting pan. Pour the chicken broth or white wine into the pan if using. This will add moisture and create a delicious base for a gravy or sauce.

8. Cooking Time:
   Roast the chicken in the preheated oven for about 1 hour and 20 minutes, or until the juices run clear when you cut between the leg and thigh, and a meat thermometer inserted into the thickest part of the thigh reads 165°F (75°C). If the skin starts to brown too quickly, cover the chicken loosely with aluminum foil.

9. Resting:
   Once the chicken is cooked, remove it from the oven and let it rest for at least 15 minutes before carving. This allows the juices to redistribute throughout the meat, ensuring each bite is juicy and flavorful.

10. Carving and Serving:
    Carve the chicken by removing the legs and thighs first, then the wings, and finally the breast meat. Serve with the roasted vegetables from the pan and your favorite sides.
 Tips for Success:

- Choosing the Right Chicken: For the best flavor, opt for an organic or free-range chicken.
- Season Generously: Don’t be afraid to season the chicken well with salt and pepper both inside and out.
- Crispy Skin:For an extra crispy skin, you can rub a little butter under the chicken skin before roasting.
- Flavor Infusion: Feel free to experiment with different herbs and citrus fruits like oranges or limes for a unique twist.

 Conclusion

Roasted lemon herb chicken is a timeless recipe that combines simplicity with gourmet results. Perfect for family dinners or special gatherings, this dish is sure to become a favorite in your culinary repertoire. Enjoy the tantalizing aromas that fill your kitchen and the delighted reactions from your guests as they savor each flavorful bite.

Monday, June 3, 2024

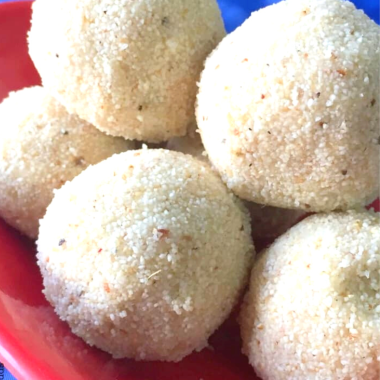
Indulge in the Irresistible: Rava Ladoo Recipe

Indulge in the Irresistible: Rava Ladoo Recipe

If there's one sweet treat that encapsulates the essence of celebration and festivity in Indian households, it's the delightful Rava Ladoo. These golden spheres of sweetness are not just a confectionery delight; they're a cultural emblem, often served during festivals, weddings, and special occasions. With a heavenly blend of semolina, sugar, ghee, and nuts, Rava Ladoo promises a burst of flavors and textures with every bite. Here's a simple recipe to recreate this beloved delicacy in your own kitchen:

Ingredients:
- 1 cup semolina (rava)
- 1 cup powdered sugar
- ½ cup ghee (clarified butter)
- ¼ cup chopped nuts (almonds, cashews, pistachios)
- ½ teaspoon cardamom powder
- A pinch of saffron strands (optional)
- Desiccated coconut for garnish (optional)

Instructions:

1. Roast the Semolina: Heat a heavy-bottomed pan over medium heat and add the semolina. Dry roast it, stirring constantly, until it turns golden brown and emits a nutty aroma. This step is crucial for achieving the perfect texture and flavor of the ladoos.

2. Prepare the Flavors: In the same pan, melt the ghee. Add the chopped nuts and sauté them until they turn golden brown. Now, add the roasted semolina back into the pan along with the cardamom powder and saffron strands. Mix well to combine all the ingredients thoroughly.

3. Sweeten the Mixture: Gradually add the powdered sugar to the semolina mixture. Stir continuously to ensure that the sugar is evenly distributed and melts into the mixture, creating a cohesive sweet blend.

4. Shape the Ladoos:Once the mixture has cooled down slightly but is still warm enough to handle, take small portions of it and shape them into round balls. Gently press each ladoo to ensure that it holds its shape.

5. Garnish and Serve:If desired, roll the prepared ladoos in desiccated coconut for an extra layer of flavor and texture. Arrange them on a serving platter and let them cool completely before indulging in their irresistible goodness.
Tips for Perfection:

- Ensure that the semolina is roasted well to achieve the desired nutty flavor and golden hue.
- Use good quality ghee for enhanced richness and aroma.
- Adjust the amount of sugar according to your preference for sweetness.
- Customize the recipe by adding your favorite nuts or dried fruits for additional texture and flavor.
Conclusion:

Rava Ladoo is not just a sweet treat; it's a tradition, a symbol of love and togetherness shared among family and friends. With its simple yet delightful combination of ingredients, this classic Indian dessert has stood the test of time, bringing joy to countless palates across the globe. So, roll up your sleeves, gather your ingredients, and embark on a culinary journey to savor the magic of Rava Ladoo in every blissful bite.

Traditional Kolukattai Recipe: A Delicious South Indian Delicacy

Traditional Kolukattai Recipe: A Delicious South Indian Delicacy

Kolukattai, also known as Kozhukattai or Modak, is a traditional South Indian sweet dish enjoyed during festivals and special occasions. This delectable treat is made from rice flour or wheat flour and filled with a sweet mixture of jaggery, coconut, and cardamom. In addition to its delightful taste, Kolukattai holds cultural significance, often being offered as prasad (religious offering) during auspicious ceremonies.

Ingredients:

1. For the outer covering:
   - 1 cup rice flour
   - 1 ½ cups water
   - 1 teaspoon ghee (clarified butter)
   - A pinch of salt

2. For the filling:
   - 1 cup grated coconut
   - ¾ cup grated jaggery
   - ½ teaspoon cardamom powder

3. For garnish (optional):
   - Ghee (clarified butter)
   - Cashews and raisins

Instructions:

1. Prepare the Filling:
   - Heat a pan on medium flame and add grated coconut and grated jaggery.
   - Stir continuously until the jaggery melts and combines well with the coconut, forming a sticky mixture.
   - Add cardamom powder for flavor and mix thoroughly. Remove from heat and let it cool.

2. Make the Dough:
   - In a saucepan, bring water to a boil. Add a pinch of salt and ghee.
   - Gradually add rice flour to the boiling water, stirring continuously to avoid lumps.
   - Once the mixture forms a dough-like consistency, remove from heat and let it cool for a few minutes.

3. Shape the Kolukattai:
   - Take a small portion of the dough and flatten it with your fingers to form a small disc.
   - Place a spoonful of the prepared filling in the center of the disc.
   - Carefully seal the edges of the disc to form a dumpling shape, ensuring the filling is completely enclosed within the dough. Repeat this process for the remaining dough and filling.
4. Steam the Kolukattai:
   - Grease a steamer plate with a little ghee to prevent sticking.
   - Arrange the shaped Kolukattai on the plate, leaving some space between each.
   - Steam the Kolukattai for about 10-12 minutes or until they are cooked through and the outer covering becomes translucent.

5. Garnish and Serve:
   - Once done, remove the Kolukattai from the steamer and brush them with a little ghee for added flavor.
   - Optionally, you can garnish with roasted cashews and raisins for a decorative touch.
   - Serve warm and enjoy the deliciousness of homemade Kolukattai with your loved ones.

Tips:
- Adjust the sweetness of the filling according to your preference by adding more or less jaggery.
- You can also experiment with different fillings such as sesame seeds, grated jaggery, and roasted nuts for variety.
- Ensure the dough is of the right consistency to easily shape the Kolukattai without cracking.
Conclusion:

Kolukattai is not just a culinary delight but also a symbol of tradition and festivity in South Indian households. With its simple yet flavorful ingredients and easy-to-follow recipe, making Kolukattai at home is a delightful experience that brings joy to both the cook and those who get to savor this delicious treat. So, why not try your hand at making Kolukattai and add a touch of sweetness to your celebrations?

Delightful Ugadi Pachadi: A Flavorful Tradition

Delightful Ugadi Pachadi: A Flavorful Tradition

Ugadi, the Telugu and Kannada New Year, is celebrated with much joy and fervor in South India. One of the essential elements of Ugadi festivities is the preparation and consumption of Ugadi Pachadi. This special dish holds significant cultural and spiritual symbolism, representing the diverse flavors of life.

Ingredients:

- Raw mango
- Jaggery
- Neem flowers
- Tamarind
- Chilli powder
- Salt

Preparation:

1. Raw Mango: Peel and chop a raw mango into small pieces.

2. Jaggery: Grate jaggery or chop it finely.

3. Neem Flowers: Pluck fresh neem flowers from the branch. Make sure to wash them thoroughly.

4. Tamarind: Soak a small ball of tamarind in warm water to extract the pulp.

5. Assembling: In a bowl, mix the chopped raw mango, grated jaggery, neem flowers, tamarind pulp, a pinch of chilli powder, and a dash of salt. Adjust the quantities according to taste preferences.

6. Stir Well: Ensure all the ingredients are well combined, creating a harmonious blend of flavors.

7. Let it Rest: Allow the Ugadi Pachadi to sit for a while so that the flavors meld together, enhancing the taste.
Symbolism:

Each ingredient in Ugadi Pachadi symbolizes a different aspect of life:

- Raw Mango: Represents tanginess, signifying surprises and unexpected events in life.
- Jaggery: Adds sweetness, symbolizing happiness and joy.
- Neem Flowers: Contribute bitterness, symbolizing the challenges and hardships faced.
- Tamarind: Offers sourness, representing the ups and downs experienced.
- Chilli Powder: Adds spiciness, symbolizing the moments of anger or irritation.
- Salt: Represents saltiness, signifying the essential balance required in life.

By combining these diverse flavors, Ugadi Pachadi teaches us to embrace all aspects of life with equanimity and grace.

Cultural Significance:

Ugadi Pachadi is not just a culinary delight but holds deep cultural significance. It is prepared and shared among family members and friends during Ugadi celebrations, fostering a sense of unity and togetherness. The act of tasting Ugadi Pachadi reminds people of the cyclical nature of life, with its highs and lows, and encourages them to face every situation with resilience and acceptance.

Conclusion:

Ugadi Pachadi is more than just a dish; it is a representation of life itself—full of diverse experiences and flavors. As we savor its taste during Ugadi festivities, let us also reflect on the profound symbolism it carries and the lessons it imparts. May the flavors of Ugadi Pachadi enrich our lives with wisdom, resilience, and gratitude as we embark on another journey around the sun. Happy Ugadi!

Thiruvathirai Kali: A Delightful South Indian Delicacy

Thiruvathirai Kali: A Delightful South Indian Delicacy

Thiruvathirai Kali is a traditional South Indian dish prepared during the festival of Thiruvathirai, particularly celebrated in Tamil Nadu and Kerala. This auspicious festival is dedicated to Lord Shiva and falls in the Tamil month of Margazhi (December-January). Thiruvathirai Kali, a sweet dish made with rice and jaggery, is an integral part of the celebrations. Here's a step-by-step guide to preparing this delightful dish.

Ingredients

1. Raw Rice - 1 cup
2. Jaggery - 1 cup
3. Water- 2.5 cups
4. Grated Coconut - 1/4 cup
5.Ghee - 3 tablespoons
6.Cardamom Powder - 1 teaspoon
7.Cashew Nuts - 10
8. Raisins - 10

Method

Preparation

1. Roast the Rice: Start by dry roasting the raw rice in a pan until it turns golden brown and emits a nutty aroma. Be careful not to burn the rice. Once roasted, allow it to cool and then grind it into a coarse powder. This should resemble the texture of rava (semolina).

2. Prepare the Jaggery Syrup: In another pan, add 1 cup of water and the jaggery. Heat until the jaggery melts completely. Strain the mixture to remove any impurities and set it aside.

 Cooking

1. Boil Water: In a heavy-bottomed pan or a thick kadai, bring 2.5 cups of water to a boil.

2. Add Rice Flour: Once the water starts boiling, slowly add the roasted and ground rice, stirring continuously to avoid lumps.

3. Cook the Rice: Reduce the heat to low and cook the rice mixture, stirring frequently, until it absorbs most of the water and becomes thick.

4. Incorporate Jaggery Syrup: Slowly pour the jaggery syrup into the cooked rice mixture. Keep stirring continuously to ensure even mixing and to prevent sticking to the bottom of the pan.

5. Add Coconut and Ghee: Once the jaggery is well incorporated, add the grated coconut and 2 tablespoons of ghee. Continue to cook on low heat, stirring frequently, until the mixture thickens and leaves the sides of the pan.

6. Seasoning: In a small pan, heat the remaining ghee and fry the cashew nuts until golden brown. Add the raisins and fry until they puff up. Pour this mixture into the Kali along with the cardamom powder. Mix well.

7. Final Touch: Cook for a few more minutes until the ghee starts to ooze out from the sides, indicating that the dish is ready.
 Serving

Thiruvathirai Kali is best enjoyed warm, often paired with Thiruvathirai Kootu, a savory and mildly spiced vegetable stew. The combination of sweet Kali and savory Kootu provides a balanced and satisfying meal.

 Tips

- Consistency: The key to perfect Thiruvathirai Kali lies in its consistency. It should neither be too dry nor too sticky. Adjust the water quantity slightly if needed.
- Roasting Rice: Ensure that the rice is evenly roasted for a consistent texture and flavor.
- Fresh Ingredients: Using fresh grated coconut and good quality jaggery enhances the taste significantly.

Thiruvathirai Kali, with its rich flavors and cultural significance, is more than just a dish; it is a celebration of tradition and devotion. Preparing this delicacy during the Thiruvathirai festival brings a sense of joy and fulfillment, making it a cherished part of South Indian culinary heritage.

Traditional Karanji Recipe: A Delightful Indian Pastry

 Traditional Karanji Recipe: A Delightful Indian Pastry

Karanji, also known as Gujiya in northern India, is a popular Indian sweet pastry, particularly cherished during festivals like Diwali and Holi. These crescent-shaped delicacies are filled with a sweet mixture of coconut, jaggery, and nuts, and are known for their crispy outer shell. Making Karanji at home is a rewarding experience, allowing you to enjoy this festive treat in its freshest form. Here’s a detailed guide on how to prepare Karanji.

 Ingredients

For the Dough:
- 2 cups all-purpose flour (maida)
- 1/4 cup semolina (sooji/rava)
- 1/4 cup hot ghee (clarified butter)
- A pinch of salt
- Water (as needed for kneading)

For the Filling:
- 1 cup grated coconut (fresh or desiccated)
- 1 cup powdered jaggery or sugar
- 1/2 cup mixed nuts (cashews, almonds, pistachios) finely chopped
- 1/4 cup poppy seeds (khus khus)
- 1/2 teaspoon cardamom powder
- 2 tablespoons ghee

For Frying:
- Oil or ghee
Instructions

1. Prepare the Dough:
   - In a large mixing bowl, combine the all-purpose flour, semolina, and a pinch of salt.
   - Heat the ghee until hot and pour it over the flour mixture. Mix thoroughly until the flour resembles breadcrumbs.
   - Gradually add water and knead the mixture into a firm dough. Cover it with a damp cloth and let it rest for at least 30 minutes.

2. Make the Filling:
   - Heat 2 tablespoons of ghee in a pan over medium heat.
   - Add the poppy seeds and sauté until they turn golden brown.
   - Add the grated coconut and sauté for a few minutes until it’s lightly browned.
   - Stir in the powdered jaggery or sugar and cook until it melts and blends well with the coconut.
   - Add the chopped nuts and cardamom powder. Mix well and cook for another 2-3 minutes.
   - Remove the pan from the heat and let the filling cool completely.

3. Shape the Karanji:
   - Divide the dough into small balls (about the size of a lemon).
   - Roll each ball into a small, thin circle (about 4-5 inches in diameter) on a lightly floured surface.
   - Place a spoonful of the filling in the center of each circle.
   - Fold the circle in half to form a semi-circle and press the edges together to seal.
   - Use a fork or a decorative cutter to crimp the edges for a secure seal and a decorative touch.

4. Fry the Karanji:
   - Heat oil or ghee in a deep frying pan over medium heat.
   - Once the oil is hot, carefully slide in a few Karanjis and fry until they turn golden brown, flipping occasionally to ensure even cooking.
   - Remove them with a slotted spoon and drain the excess oil on paper towels.

5. Serve and Store:
   - Allow the Karanji to cool completely before serving. They can be stored in an airtight container for up to a week.

Tips for Perfect Karanji
- Ensure the dough is firm but pliable to avoid cracking while shaping.
- The filling should be completely cool before stuffing to prevent the dough from becoming soggy.
- Fry the Karanji on medium heat to ensure they cook evenly and remain crispy.

Karanji is a delightful addition to any festive spread, bringing together the rich flavors of coconut, jaggery, and nuts in a crispy pastry shell. This traditional recipe, handed down through generations, is sure to be a hit with family and friends during any celebration. Enjoy making and sharing this delectable treat!

Dhaniya Panjiri Recipe: A Traditional Indian Delicacy

Dhaniya Panjiri Recipe: A Traditional Indian Delicacy

Dhaniya Panjiri, a traditional Indian delicacy, holds a special place in the culinary landscape of North India. This aromatic and nutritious sweet treat is often prepared during religious festivals and rituals, especially during Janmashtami, the birth celebration of Lord Krishna. Made from coriander seeds (dhaniya), this recipe is cherished for its simplicity and health benefits. Let’s delve into the steps to create this delightful dish.

 Ingredients:
- 1 cup coriander seeds (dhaniya)
- 1/2 cup powdered sugar or jaggery
- 1/4 cup desi ghee (clarified butter)
- 2 tablespoons chopped nuts (almonds, cashews, or pistachios)
- 1 tablespoon edible gum (gond), optional
- 1 tablespoon desiccated coconut, optional
- 1 teaspoon cardamom powder

Instructions:

1. Roasting Coriander Seeds:
   - Begin by dry roasting the coriander seeds in a pan over medium heat. Stir continuously to ensure even roasting and prevent burning. Roast until they turn a light golden brown and release a pleasant aroma.
   - Once roasted, let the seeds cool down to room temperature. Then, grind them into a fine powder using a spice grinder or a blender.

2. Preparing Nuts and Edible Gum:
   - In a separate pan, heat a teaspoon of ghee. Add the chopped nuts and roast them until they turn golden and crispy. Remove and set aside.
   - If using edible gum, add it to the same pan with some ghee and fry until it puffs up. Be cautious as it can splutter. Once done, crush the edible gum into small pieces.

3. Making Panjiri:
   - In a heavy-bottomed pan, heat the remaining ghee on a low flame.
   - Add the ground coriander seed powder to the pan and roast for about 5-7 minutes, stirring continuously. This helps to enhance the flavor and ensures that the coriander powder is well cooked.
   - Now, add the powdered sugar or jaggery, roasted nuts, crushed edible gum, desiccated coconut, and cardamom powder. Mix well to combine all the ingredients.
   - Continue to roast for another 2-3 minutes, ensuring everything is well incorporated and the sugar or jaggery melts evenly.

4. Cooling and Storage:
   - Allow the mixture to cool completely. Once cooled, store the Dhaniya Panjiri in an airtight container. It can be enjoyed as a nutritious snack or a festive sweet.

 Health Benefits:
Dhaniya Panjiri is not only a festive treat but also a healthful snack. Coriander seeds are known for their digestive properties and are rich in vitamins and minerals. The ghee adds a dose of healthy fats, while nuts provide protein and essential nutrients. Using jaggery instead of sugar can enhance the nutritional value by adding iron and other minerals.
 Serving Suggestions:
Dhaniya Panjiri can be enjoyed on its own or paired with warm milk. It is often served as prasad (offering) during religious ceremonies, symbolizing purity and devotion.

In conclusion, Dhaniya Panjiri is a delightful amalgamation of taste and tradition. Its simplicity in preparation and wholesome ingredients make it a beloved dish across Indian households. Whether you are celebrating a festival or simply craving a nutritious treat, Dhaniya Panjiri is a recipe that brings a touch of tradition and flavor to your table.

Sunday, June 2, 2024

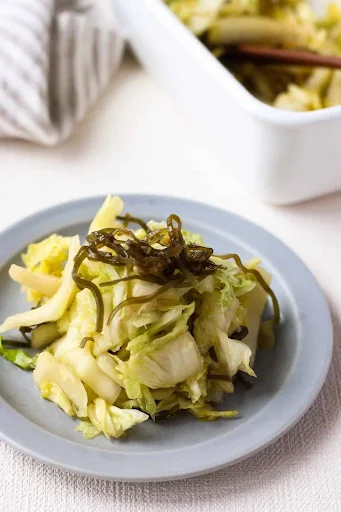
Hakusai Recipe: A Guide to Japanese Pickled Napa Cabbage

Hakusai Recipe: A Guide to Japanese Pickled Napa Cabbage

Hakusai, known in English as Napa cabbage or Chinese cabbage, is a staple vegetable in Japanese cuisine. Its versatility and mild, slightly sweet flavor make it an excellent ingredient for a variety of dishes. One of the most beloved ways to prepare hakusai is through pickling, creating a dish known as "hakusai no tsukemono." This article will guide you through a simple and traditional recipe for Japanese pickled Napa cabbage.

 Ingredients

- 1 large head of Napa cabbage (hakusai)
- 3 tablespoons salt
- 1 small piece of konbu (dried kelp), cut into thin strips
- 1-2 dried red chili peppers, cut into rings (optional)
- 1 cup of water
- 1/2 cup of rice vinegar
- 2 tablespoons sugar
- 1 tablespoon sake

 Instructions

 Step 1: Preparation

1.Cleaning and Cutting: Remove any damaged outer leaves from the Napa cabbage. Rinse the cabbage thoroughly under cold water to remove any dirt or impurities. Cut the cabbage into quarters lengthwise, and then cut each quarter into 2-inch wide pieces.

2.Salting: Place the cabbage pieces in a large bowl or container. Sprinkle salt evenly over the cabbage layers, ensuring all pieces are well-coated. Salt helps to draw out excess water from the cabbage, which is essential for the pickling process.

3.Weighing Down: Cover the salted cabbage with a plate or a lid that fits inside the container. Place a weight on top (such as a clean rock or a bag filled with water) to press down on the cabbage. This will help to expel more water and compact the cabbage.

4.Resting: Let the salted cabbage rest at room temperature for about 6-8 hours or overnight. During this time, the cabbage will soften and release a significant amount of liquid.
 Step 2: Pickling

1.Draining: After the resting period, drain the excess liquid from the cabbage. Lightly rinse the cabbage under cold water to remove excess salt, then gently squeeze out any remaining water.

2.Flavoring: In a small saucepan, combine water, rice vinegar, sugar, and sake. Heat the mixture over medium heat, stirring occasionally until the sugar dissolves. Remove from heat and let it cool to room temperature.

3. **Combining Ingredients**: In a clean container, layer the cabbage pieces with strips of konbu and red chili pepper rings (if using). Pour the cooled vinegar mixture over the cabbage, ensuring all pieces are submerged.

4.Marinating: Cover the container and refrigerate for at least 24 hours to allow the flavors to meld. The pickled cabbage can be stored in the refrigerator for up to two weeks.

 Serving Suggestions

Hakusai no tsukemono can be enjoyed in various ways:
- As a Side Dish: Serve it alongside rice and other main dishes for a refreshing, crunchy contrast.
- In Bento Boxes: Include it as a flavorful and colorful addition to bento box lunches.
- With Noodles: Add it to noodle dishes like ramen or soba for an extra layer of taste and texture.
 Tips and Variations

- Add Citrus: For a citrusy twist, include a few slices of yuzu or lemon zest in the pickling mixture.
- Spice Level: Adjust the number of chili peppers based on your spice preference.
- Experiment with Add-ins: Try adding julienned carrots or sliced daikon radish for additional color and flavor.

Making hakusai no tsukemono is a delightful way to bring a piece of Japanese culinary tradition into your home. The balance of saltiness, acidity, and slight sweetness makes it a versatile dish that complements a wide array of meals. Enjoy the art of Japanese pickling with this simple and authentic recipe!

Panchamrit Recipe: A Sacred Concoction

 Panchamrit Recipe: A Sacred Concoction

Panchamrit, also known as Panchamrut, is a traditional Indian concoction with deep roots in Hindu rituals and ceremonies. The name Panchamrit translates to "five nectars" in Sanskrit, symbolizing the five essential ingredients that make up this sacred mixture. These ingredients—milk, yogurt, honey, sugar, and ghee—are believed to represent purity, health, and nourishment. Panchamrit is not only a staple in religious offerings but also a nutritious drink consumed for its health benefits.

 Ingredients:
- Milk: 1 cup (preferably cow's milk)
- Yogurt: 1 tablespoon
- Honey: 1 tablespoon
- Sugar: 1 tablespoon (traditionally, jaggery can also be used)
- Ghee: 1 teaspoon (clarified butter)
- Tulsi leaves: A few (optional, for added sanctity and health benefits)
- Banana: Half, chopped (optional, for additional taste and nutrition)
- Cardamom powder: A pinch (optional, for flavor)

Instructions:
1.Milk Preparation: Start by boiling the milk and then let it cool to room temperature. Boiling ensures the milk is pure and free from any impurities, aligning with the sacred nature of Panchamrit.
   
2. Combining Yogurt and Ghee: In a clean bowl, add the yogurt and ghee. Whisk them together until they are well combined. This step ensures a smooth texture when mixed with other ingredients.
   
3.Adding Sweetness: Stir in the honey and sugar (or jaggery). Mix until the sugar is completely dissolved. Honey is considered the elixir of life in Ayurveda, adding both taste and health benefits.
   
4.Mixing with Milk: Gradually add the cooled milk to the mixture, stirring continuously to avoid any lumps. The milk serves as the base, carrying all other ingredients and their benefits.
   
5.Optional Enhancements: If using Tulsi leaves, cardamom powder, or banana, add them at this stage. Tulsi leaves are revered for their medicinal properties, while cardamom and banana enhance the flavor and nutritional profile of the drink.

6.Final Stir: Give the Panchamrit a final stir, ensuring all ingredients are well incorporated. The mixture should be homogeneous, reflecting the unity and balance of the five nectars.
Serving:
Panchamrit is traditionally served in small quantities, especially during rituals and religious ceremonies. It is offered to deities and then distributed among devotees as prasad (holy offering). Outside of religious contexts, Panchamrit can be enjoyed as a nutritious drink that is rich in probiotics, antioxidants, and essential fats.

Health Benefits:
Panchamrit is more than a ritualistic offering; it is a powerhouse of nutrition:
- Milk provides calcium and vitamin D, crucial for bone health.
- Yogurt is rich in probiotics, aiding in digestion and promoting gut health.
- Honey is a natural sweetener with antimicrobial properties.
- Sugar or jaggery adds instant energy.
- Ghee contains healthy fats that are essential for brain function and overall well-being.

The optional ingredients like Tulsi and cardamom offer additional health benefits, from boosting immunity to aiding digestion.

 Cultural Significance:
In Hindu culture, Panchamrit is used during various rituals such as pujas (prayers), yagnas (sacrificial rites), and abhishekas (anointing ceremonies). Each ingredient symbolizes a different aspect of life and divinity—milk for purity, yogurt for prosperity, honey for sweetness, sugar for happiness, and ghee for strength. Together, they embody a holistic approach to physical and spiritual well-being.

 Conclusion:
Panchamrit is a timeless recipe that seamlessly blends tradition, spirituality, and nutrition. Whether you are preparing it for a religious ceremony or simply to enjoy its health benefits, Panchamrit is a reminder of the richness of Indian culinary heritage and the holistic principles of Ayurveda. Try making Panchamrit at home and experience the divine taste and benefits of this ancient elixir.

The Delightful "S*x on a Bench" Cocktail Recipe

 The Delightful "S*x on a Bench" Cocktail Recipe

The "S*x on a Bench" cocktail is a playful twist on the classic "S*x on the Beach" drink. Known for its fruity and refreshing flavor, this cocktail is a hit at summer parties, beach gatherings, and any occasion where a fun and vibrant drink is desired. This version, however, brings a new element to the table with a unique combination of ingredients that adds depth and complexity to the taste.

Ingredients

To make a "S*x on a Bench" cocktail, you will need the following ingredients:

- 1 oz vodka
- 1 oz peach schnapps
- 1 oz raspberry liqueur (such as Chambord)
- 2 oz cranberry juice
- 2 oz pineapple juice
- Ice cubes
- Orange slice and maraschino cherry for garnish (optional)

Instructions

1. Prepare Your Glass: Fill a highball glass or a tall cocktail glass with ice cubes to chill it while you prepare the cocktail.

2. Mix the Liquors: In a cocktail shaker, combine the vodka, peach schnapps, and raspberry liqueur. 

3. Add the Juices: Pour in the cranberry juice and pineapple juice. These two juices give the drink its signature fruity flavor and beautiful color.

4. Shake It Up: Cover the cocktail shaker and shake vigorously for about 10-15 seconds. Shaking not only mixes the ingredients thoroughly but also chills the drink.

5. Pour and Serve: Discard the ice from your glass and pour the mixture into the chilled glass. 

6. Garnish: For an extra touch, garnish with an orange slice and a maraschino cherry on top. This not only adds to the visual appeal but also provides a hint of citrus aroma with each sip.
Tips and Variations

- Fresh Juices: For a fresher taste, consider using freshly squeezed cranberry and pineapple juices. The natural flavors will make the drink even more delightful.
  
- Mocktail Version: If you prefer a non-alcoholic version, replace the vodka, peach schnapps, and raspberry liqueur with peach nectar and a splash of raspberry syrup. You’ll still enjoy the fruity flavors without the alcohol content.

- Batch Preparation: If you're hosting a party, you can easily scale up the recipe. Prepare a larger batch in a pitcher, keeping the proportions consistent, and serve over ice as needed.

Serving Suggestions

The "S*x on a Bench" cocktail is best enjoyed chilled and can be served as a refreshing drink on a hot day or as a festive beverage at gatherings. Pair it with light appetizers such as fruit platters, cheese boards, or shrimp cocktails to complement the fruity notes of the drink.

 Conclusion

The "S*x on a Bench" cocktail is a delightful and flavorful beverage that offers a fun twist on a classic favorite. Whether you're mixing up a single drink for yourself or preparing a large batch for friends, this recipe is sure to be a hit. With its vibrant colors and refreshing taste, it's the perfect drink to enjoy any time you want to add a bit of fun and flavor to your day. Cheers!

Delicious Homemade Mango Pickle Recipe

Delicious Homemade Mango Pickle Recipe

Mango pickle, known for its tangy, spicy, and flavorful taste, is a beloved condiment enjoyed in many cultures around the world. Made from raw green mangoes, spices, and oil, this pickle is a delightful addition to any meal, adding a burst of flavor that complements a variety of dishes. Whether paired with rice, roti, or as a condiment on the side, mango pickle is a versatile and delicious accompaniment that can elevate any meal.

Ingredients:

 2 large raw green mangoes
 4 tablespoons mustard oil (or any cooking oil of your choice)
 2 teaspoons mustard seeds
 1 teaspoon fenugreek seeds
 1 teaspoon fennel seeds
 1 teaspoon nigella seeds (kalonji)
 1 teaspoon turmeric powder
 2 teaspoons red chili powder (adjust according to your spice preference)
 1 teaspoon asafoetida (hing)
 Salt to taste
Instructions:

1. Prepare the Mangoes: Wash the raw green mangoes thoroughly and wipe them dry with a clean kitchen towel. Cut the mangoes into small, bite-sized pieces, discarding the seed.

2. Dry Roast the Spices: In a small pan, dry roast the mustard seeds, fenugreek seeds, fennel seeds, and nigella seeds until they become fragrant. Be careful not to burn them. Once roasted, allow them to cool down.

3. Grind the Spices: Once the roasted spices have cooled, grind them into a coarse powder using a mortar and pestle or a spice grinder.

4. Mix the Spices: In a mixing bowl, combine the ground spices with turmeric powder, red chili powder, asafoetida, and salt. Mix well to ensure that all the spices are evenly distributed.

5. Prepare the Pickling Oil: Heat the mustard oil (or your preferred cooking oil) in a small pan until it reaches smoking point. Turn off the heat and allow the oil to cool slightly.

6. Combine Everything: Add the chopped mango pieces to the spice mixture in the mixing bowl. Pour the slightly cooled oil over the mangoes and spices, ensuring that all the mango pieces are coated evenly.

7. Store in a Jar: Transfer the mango pickle mixture into a clean, sterilized glass jar. Press down gently to remove any air bubbles and ensure that the mango pieces are fully submerged in the oil.

8. Let it Mature: Place the jar in a cool, dry place away from direct sunlight. Allow the mango pickle to mature for at least 3-4 days before consuming. During this time, the flavors will meld together, resulting in a delicious and flavorful pickle.

9. Enjoy: Once the pickle has matured, it is ready to be enjoyed! Serve it as a side dish with your favorite meals, or use it as a condiment to add a burst of flavor to sandwiches, wraps, and snacks.
Tips:

- Make sure to use clean and dry utensils and jars to prevent any spoilage.
- Adjust the spice levels according to your preference. You can add more or less chili powder to suit your taste.
- For a variation, you can add other spices like cloves, cinnamon, or cumin seeds to customize the flavor of your mango pickle.

Homemade mango pickle is not only delicious but also a healthier alternative to store-bought pickles, as you can control the ingredients and avoid any preservatives or additives. So why not try making this flavorful condiment at home and add a taste of summer to your meals?

Euro 2024: A Look at the Mascots of the European Championships

 Euro 2024: A Look at the Mascots of the European Championships The UEFA European Championship, commonly referred to as the Euros, is one of...